
Create and publish InfoPath form using SharePoint list in Microsoft InfoPath Designer 2010
The InfoPath Forms Services technology is available in the Microsoft Office SharePoint Server. InfoPath creates an XSN file which contains files XML schema, XSL files etc. data that the user enters into the form is stored in the XML file.
To create InfoPath form, you should have SharePoint InfoPath designer 2010 and a created list to which you want to create InfoPath form. If you don’t have any list then you can also create by InfoPath designer.
Please follow below instructions to create InfoPath form:
- Open SharePoint InfoPath Designer.
- In Popular Form Template, select ‘SharePoint List’.
- Click on ‘Design Form’ to open the InfoPath form.
- When you will select the ‘Design Form’, a ‘Data Connection Wizard’ will appear.
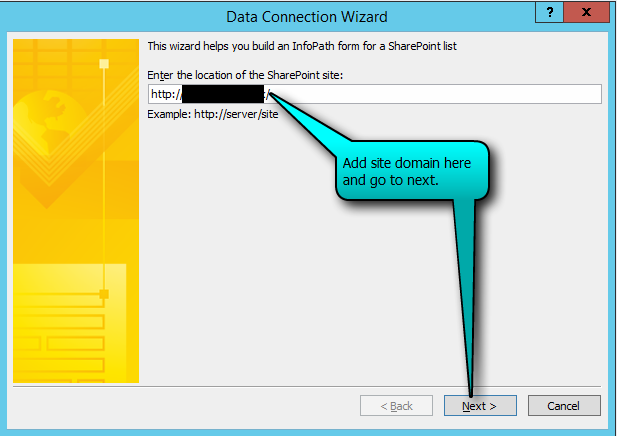
- In ‘Enter the location of the SharePoint site’ text box, write SharePoint site name as shown in below example and go to next.
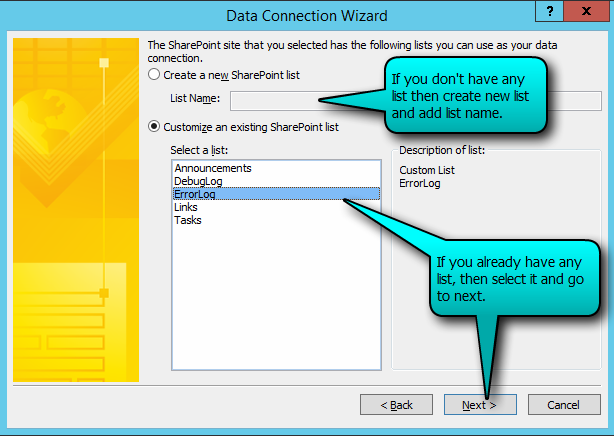
6. In Data connection wizard, you will get 2 radio buttons. One is to ‘Create new SharePoint list’ and 2nd one to ‘Customize an existing SharePoint list’.
Create new SharePoint:
- If you don’t have any list on site then select first option.
- In ‘List Name’ textbox, write the list name which you want to create and go to next and follow the instructions as described from #7.
- Once InfoPath form has created, you will get only 2 fields over there. One is ‘Title’ and 2nd one is ‘Attachment’. By using the given properties of the form, you can add more fields as you create in list on server.
- After adding/removing existing field, save the form and publish the form.
Customize an existing SharePoint list:
- If you already have a list then select 2nd point ‘Customize an existing SharePoint list’ and then select the list and go to next.
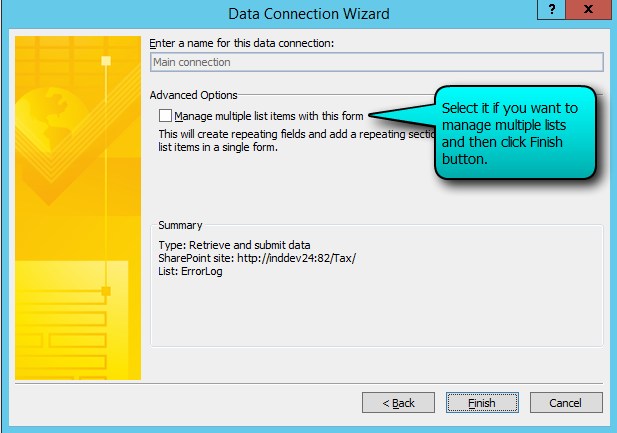
7. In Data connection wizard, you will get ‘Advanced Options’. If you want to manage multiple list items then select ‘Manage multiple list items with this form’ checkbox.
8. Press ‘Finish’ button to complete the process.
9. InfoPath form has created. You will get all the fields of list and can update any field (add/remove any field) or can update property of any filed of list.
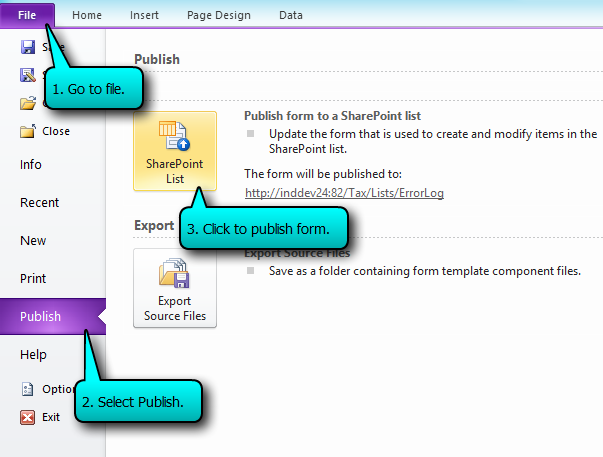
10. Save the form and publish it.
11. Now whenever you will create any item in list by clicking ‘Add new item’ link button, InfoPath form will open, through this you can add item to list.


