
As we have learned from how to create an AWS account to write an Alexa skill in a first part of a blog.
This is the second part of a blog, where we will be covering how to deploy our customized Alexa skill for testing and publish it into Amazon Alexa skill store.
Let’s start with last two steps as we discussed at the beginning of first part of a blog:-
- Deploy our Alexa Skill for testing:-
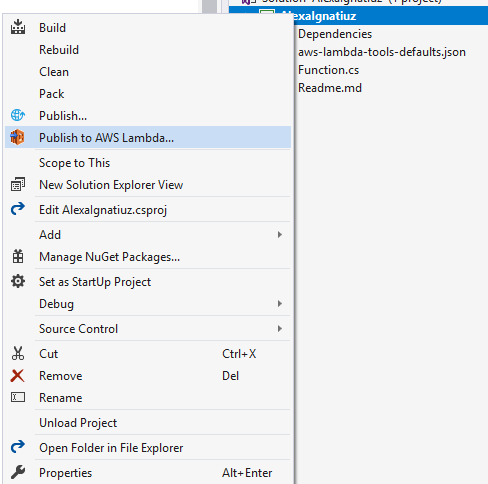
To deploy our created Alexa skill, Go to your project and right click on it then click Publish to AWS Lambda.
The upload wizard will be shown. we should just name our function. After that press Next. In the Advanced Function Details page. Click on the Role Name drop-down and select AWSLambdaBasicExecutionRole from the list then Click Upload. After uploading is done, we will see the Lambda testing screen. Here we can send sample JSON payloads to your endpoint and see how it responds.
1.1 Test our Alexa Skill:-
Firstly, we have to set up our deployed Lambda so that it can be triggered by Alexa. To do that just go to AWS dashboard and open up the Lambda service section. Click on Functions and select the function we just uploaded then Click on the Configuration and select Alexa Skills Kit from the drop-down.Keep this window open, we’ll need it in a moment.
Go to Amazon Developer Dashboard and click on the Alexa tab at the top. Under Alexa Skills Kit, click Get Started. Click Add a New Skill and give our skill a Name and an Invocation Name(what others will say to use our skill) and click Next

Now we need to add a schema to describe what intents our skill is going to support. So we need some samples of utterances that are going to trigger the different intents. Suppose talking to our device, saying like:- “Alexa ask [Invocation Name] for [Sample Utterance]”.
Click Next and Configuration page will be shown. Choose the AWS Lambda (Amazon Resource Name) and check North America. Now we just need resource to point to. Remember that window for our Lambda function that was open? Just go back to that window and copy the ARN for our function and paste it into the box labeled North America. Now click Next and we are ready to test. If we are using the same Amazon account for our AWS deployment as we use for your Alexa-enabled device.
- Publish an Alexa Skill(Submit your Skill for certification):-
When we submit our skill to the Alexa skills store, it must pass a certification process before it can be published live to Amazon customers.
Once Skill submission is done, it shows “In Certification” in the Status of skills. While Skill is in the certification process, we cannot make any further updation to the configuration. If we change our mind, we can select the skill, then click the Withdraw from Certification.
For more specification about Publish an Alexa Skill(Submit your Skill for certification) please go through the below links:-
Steps:-


[…] Set up Visual Studio for lambda services and write our Alexa Skill in C# and In the second part Customization of Alexa skill II where we have covered Deploy our Alexa Skill for testing and publish an Alexa […]