
Not able to add users from “User Roles” or “Employee Manager” section.
Enter the email address and select the desired user from the dropdown list.
Once you have installed Office365 Timesheet app on your subsite, you need to grant permission to the users to whom you want to use the app. Now the first question which comes in your mind is:
How should I give permission to the users?
It is not tough, even if you are new to Microsoft office 365 or SharePoint it is very easy to grant permission to the users, once you have installed Office 365 Timesheet app by default your role will be of “Administrator”. Now just follow the steps mentioned below:
- Go to the site on which you have installed Office 365 Timesheet app.
- Go to site settings.
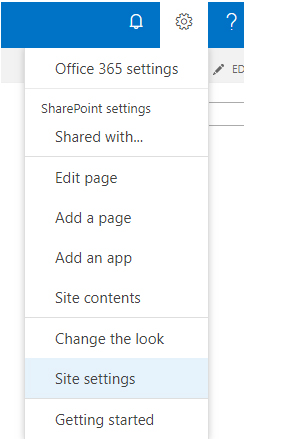
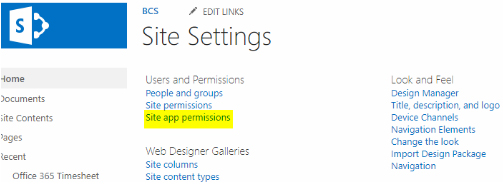
Click on “Site Permissions” present under “User and Permissions”.
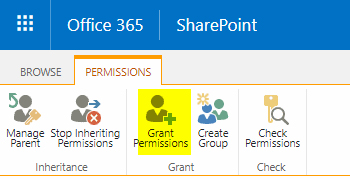
Click on “Grant Permissions” present under “Permissions”.
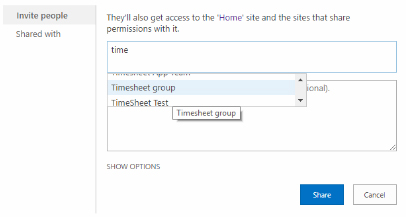
Enter the email address and select the desired user from the dropdown list.
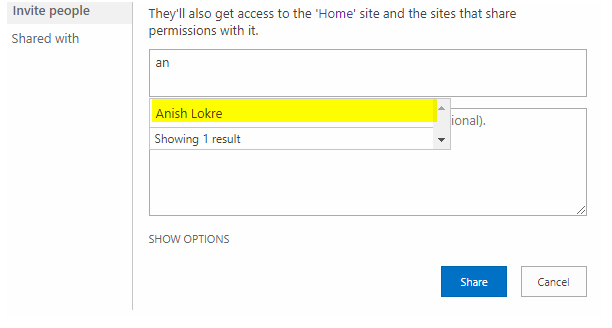
Click on “Show Options”.
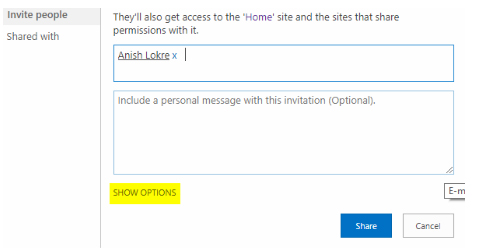
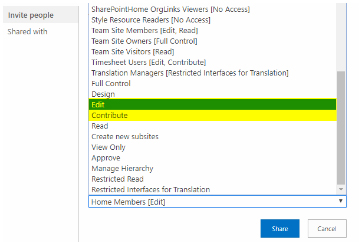
Select the permission as ”Edit” or “Contribute” and click on “Share”

The above steps looks simple and good if you have a small team, but what if the team size is large or in fact huge? Not to worry, the only tweak you have to do is create a group of those users and grant them permission of same “Edit or Contribute” and you are all done.
Steps: –
- Go to the site on which you have installed Office 365 Timesheet app.
- Go to site settings.
- Click on “Site Permissions” present under “User and Permissions”.
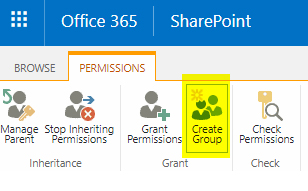
- Click on “Create Group”.
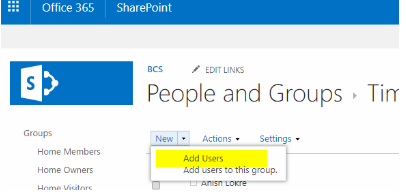
Add users to the group.
Go to “Grant Permission”.
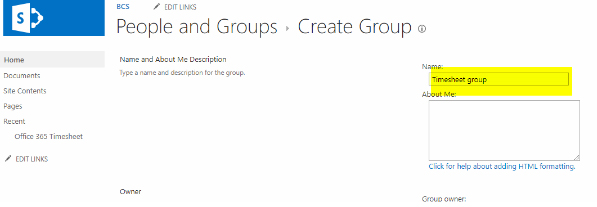
Enter the name of the group and select from the dropdown list.
Click on “Show Options”.
Select the permission as ”Edit” or “Contribute” and click on “Share”
So now after completing above steps you are one step closer to use Office 365 Timesheet app.
Once you have installed Office 365 Timesheet app at your subsite, by default the app assigns you the role of administrator.
After creating any other user roles other than administrator, and then you delete yourself (Administrator), you will receive an error mentioned below:
Hence, we advise you never delete the administrator role, unless you have already assign a role of administrator to any other user.
If in the initial stage suppose by mistake you deletes the administrator role, and there is no there is no other administrator already created, then the only solution is to remove the add-in and re-install Office 365 Timesheet app.
To create “Manager” in timesheet it’s necessary that Administrator should create user role as manager via “User Roles” section.
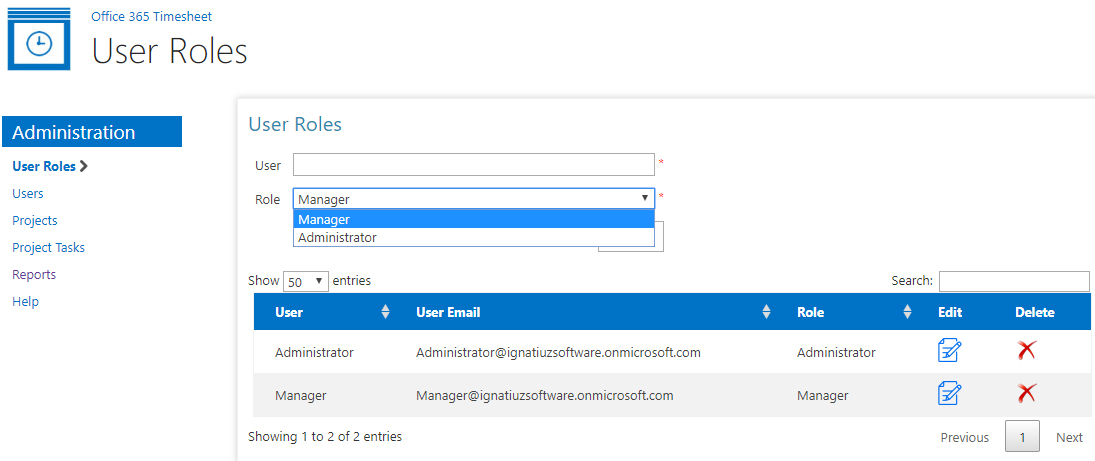
Here only Administrator have the authority to add manager.
- Login as administrator.
- Go on User Role link.
- Enter user name.
- Select role as “Manager”.
- Click on “Save”.
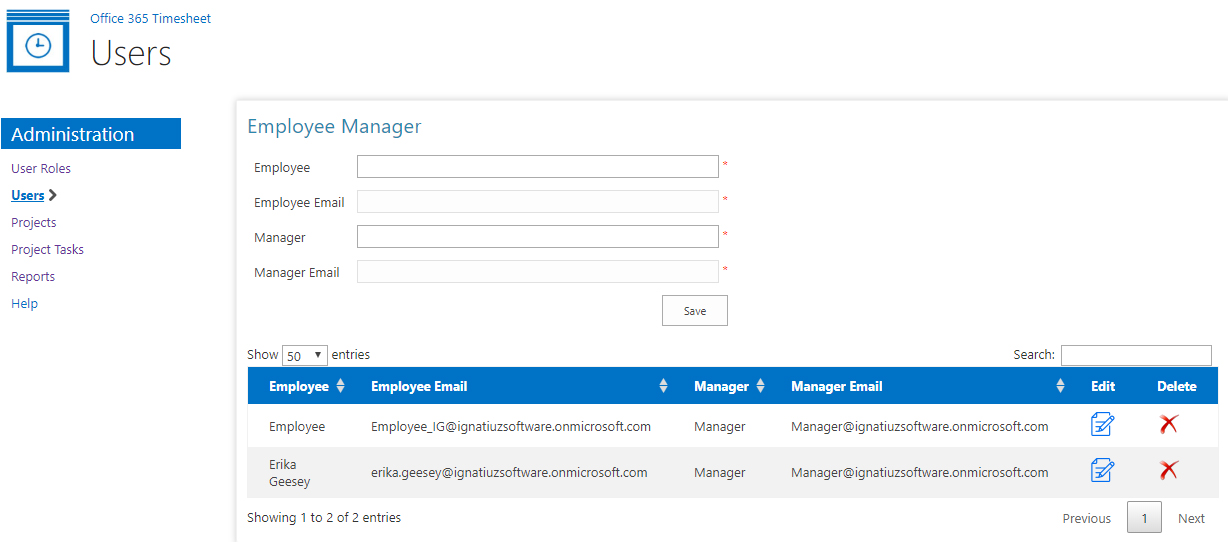
As the manager is now created he\she can add an employee’s form their account.
- Login as “Manager”.
- Click on “User” link present in the left navigation.
- Enter employee name.
- Select associated manager for employee.
- Click on “Save”.
In Office 365 Timesheet app, only those reports can be fetched which are approved or are still in pending for approval state.
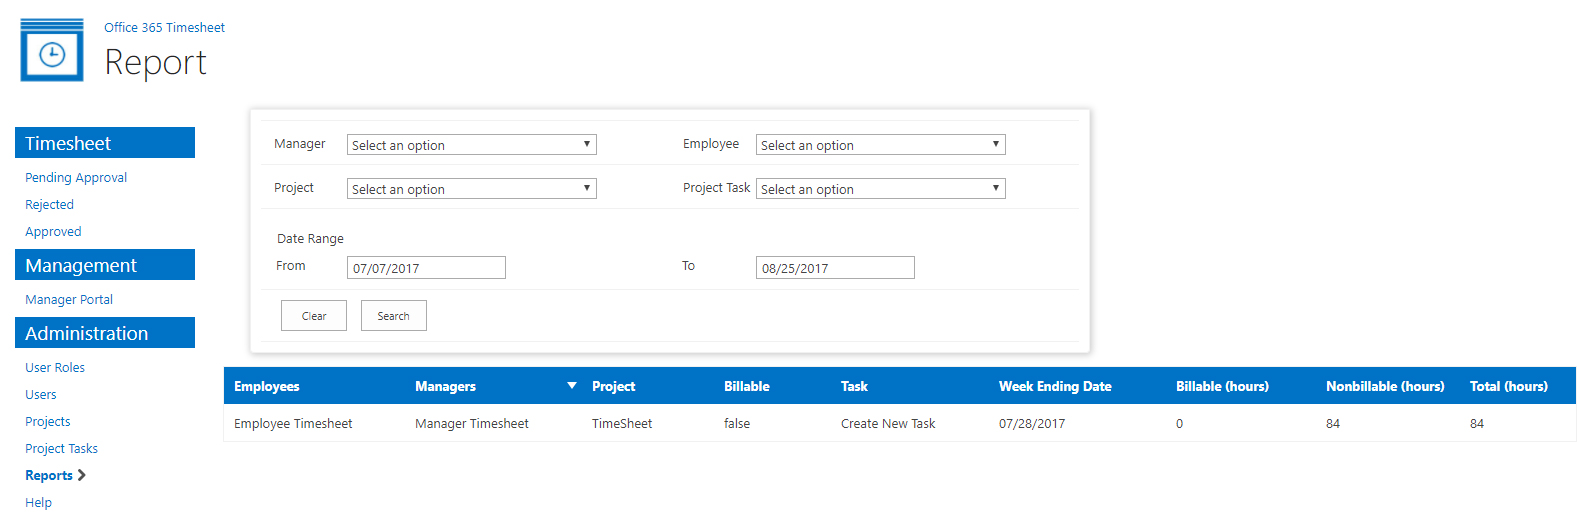
To generate a report please follow the steps mentioned below.
- Click on “Reports” link present in the left navigation.
- Select a “Manager”
- Select an “Employee”
- Select a “Project”
- Select a “Project Task”
- Select date range “From” and “To”
- Click on “Search”
A report according to the selected criteria will appear in the below grid.
A report for the entire year, month and week can also be generated by applying a relevant search criterion.
After generating a report, one can also export the report using the “Export data” link in various forms like (CSV, Excel, PDF).


