
SharePoint Framework (SPFx) is a page or a part of the web that provides support for the SharePoint development at Client Side, Ease of integration with SharePoint data and open source tools. With this framework, you can use the Modern technologies and tools for the development environment to build product and apps which are responsive and mobile-ready also from the beginning. It works for both the SharePoint Online and SharePoint on-premises.
Features:
- Runs in context of current user in browser with no iFrames (Javascript is embedded directly to the page).
- Responsive and accessible by nature.
- Enables the developers to access the lifecycle for render, load, configuration changes, etc.
- Reliable performance
- End-user can use SPFx approved by tenant admin on all sites including the team, group or personal
- Can be added to both Classic and Modern pages
Setup Development Environment –
You will be required to install the developer tools mentioned below –
- NodeJS LTS Version 10
- Code Editors (Anyone):
- Yeoman and gulp with the command – npm install -g yo gulp
- Yeoman SharePoint Generator with the command – npm install -g @microsoft/generator-sharepoint
Create the Web Part –
Once the installation part is completed we can move on to creating a Hello World web part, For creating a new project using the below command –
- md helloworld-webpart
Then move into the newly created directory with the command mentioned below –
- cd helloworld-webpart
Now we can create the HelloWorld web part by running the Yeoman SharePoint Generator with the below command –
- yo @microsoft/sharepoint
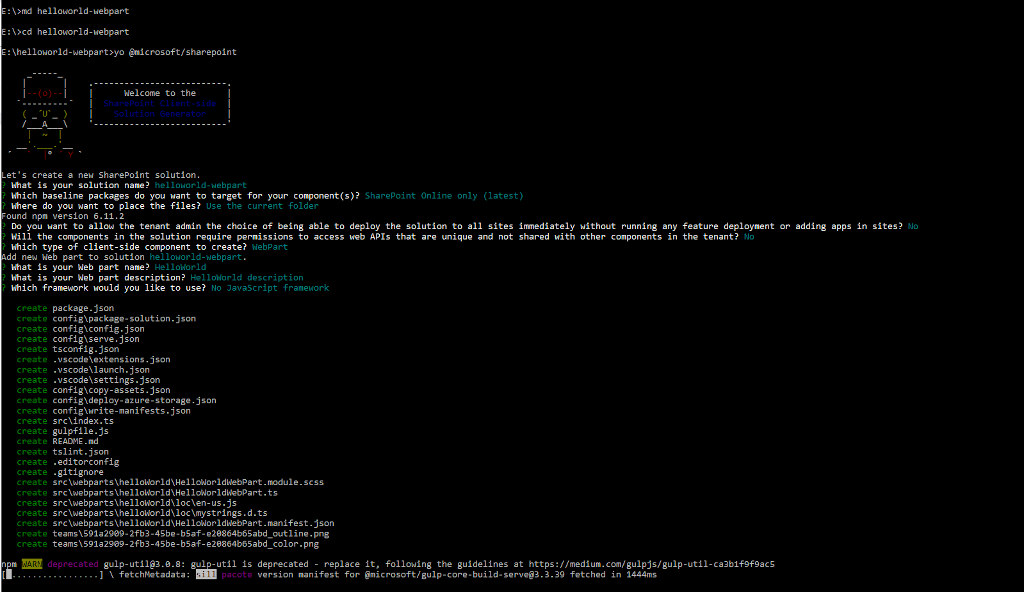
Now it will ask for the few sets of questions like –
- Project/Solution information –
- Accept the default as your solution name, Hit Enter.
- From dropdown select the SharePoint Online only (latest), Hit Enter.
- We can opt for the Files to be placed in which folder current or subfolder, for now, we will use the current Folder.
- Enter N to allow the solution to be deployed to all sites immediately
- Enter N on the questions for if the solution contains unique permissions.
- From the dropdown select the WebPart as the client-side component to be created.
- WebPart information –
- Select the default HelloWorld as the web part name, Hit Enter.
- Select the default HelloWorld description as web part description, Hit Enter.
- From the dropdown select the No Javascript Web Framework as the framework would like to be used in the web part and Hit Enter.
The whole process will look like the below screenshot –
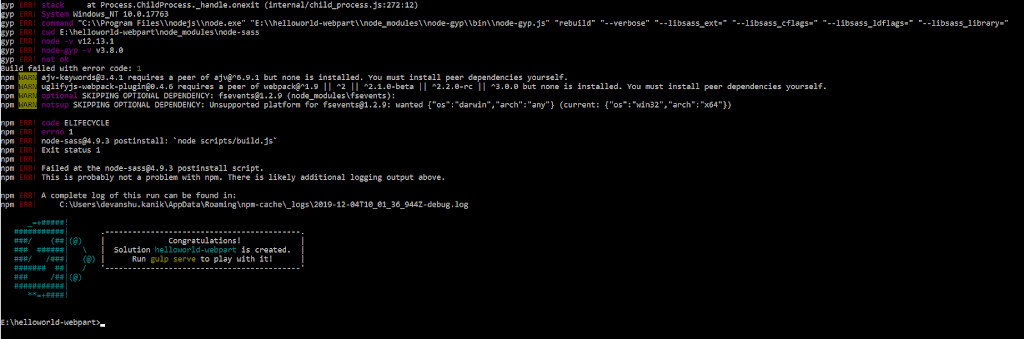
Once the project gets created successfully you will be prompted in the CMD prompt like –
Previewing the web part –
For a fresh development environment, the developer certificate has to be installed with the below-mentioned command once –
- gulp trust-dev-cert
Now once the certificate is installed we can preview the web part by running the below command –
- gulp serve
For the customization to be made in the code being created from the command prompt we can open the project from the created folder into the Visual Studio code and do the required changes there. The language used in this Web part is TypeScript which is a typed version of the Javascript
“gulp serve” command set up a local server and started that to preview the web part so whenever we want the stop it – we can press the CNTRL+C and Hit Y in the Command prompt. While making changes to the files and pressing CNTRL + S from any IDE will refresh the web page automatically.
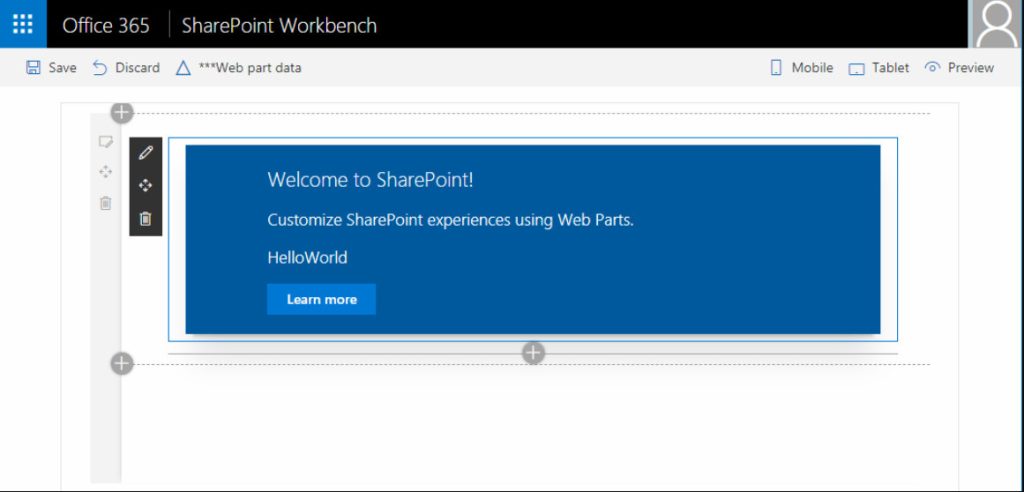
We can also test the Web part with the actual data without deploying it to SharePoint Online by following the below URL – https:///_layouts/15/workbench.aspx

It will look like as in the below image –
These layouts are mobile-friendly and we can do a lot more with the SPFX web parts below I am providing you some of the helpful links which can guide the way to proceed further.
- Using the JQuery in the Sharepoint web parts refer to this link
- For accessing the Sharepoint List in the web parts refer this link
- For testing out the actual data hosted on Sharepoint without deploy use this link
- For retrieving the data of a list in web part and display in table use this link
- For Deployment over Sharepoint online use this link
- For ship, deploy and use as production with Office 365 CDN use this link
Click Here to know more about out Intelligent Intranet 2020.
To gather more information about the Xamarin contact us today at +1-484-200-7375 or send us a message